
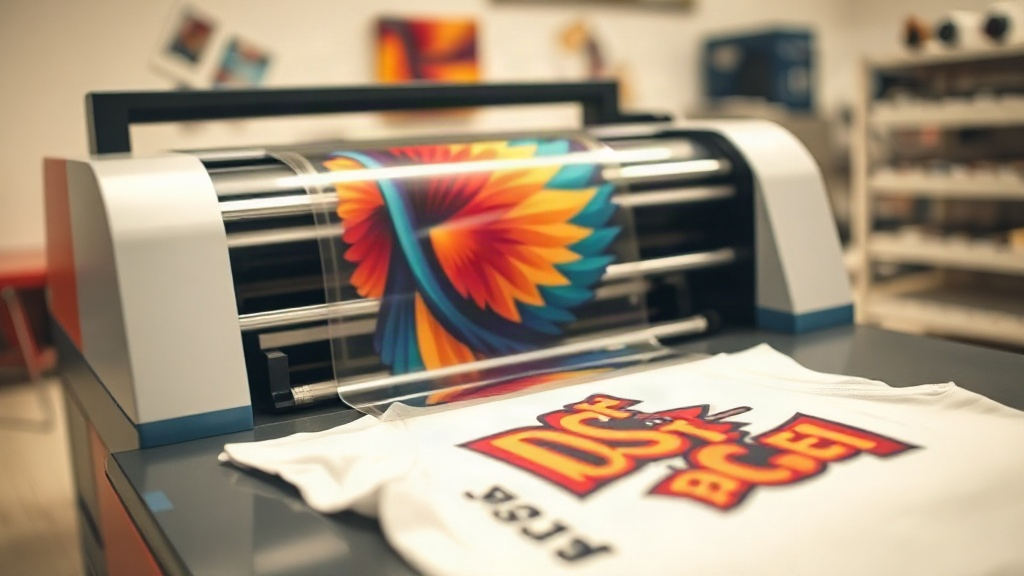
If you've been exploring custom apparel decoration, you've likely encountered DTF printing. It stands for Direct to Film, and it's rapidly becoming a favorite among small business owners, crafters, and print shops. Unlike traditional screen printing or vinyl cutting, DTF offers incredible versatility: it works on cotton, polyester, blends, and even hard-to-print fabrics like nylon and leather. The process involves printing your design onto a special film, applying a thermoplastic powder, and then heat-pressing it onto the garment. The result is a soft, stretchable, and durable transfer that can handle repeated washing. In this guide, I'll walk you through each step of the DTF workflow, share practical tips I've learned from countless trials, and help you avoid common pitfalls. Whether you're a hobbyist or a growing business, mastering DTF can open up new creative and revenue opportunities.
What Exactly Is DTF Printing?
DTF printing is a digital printing method where your artwork is printed onto a PET film using specialized pigment inks. A fine layer of hot-melt adhesive powder is applied to the wet ink, then cured. The resulting transfer can be stored for months and applied on demand. The magic happens during heat pressing: the powder melts, bonding the ink to the fabric fibers. This creates a strong, flexible bond that outlasts many other transfer types. Because no weeding or cutting is required, DTF is ideal for complex, multi-color designs with fine details and gradients. It also eliminates the setup costs of screen printing, making short runs and one-offs economically viable.
Key Components of the DTF Process
- DTF printer: Usually a modified inkjet printer with white ink circulation and a film feeder.
- DTF film: PET film coated to release the ink properly; available in cold-peel and hot-peel variants.
- DTF ink: Pigment-based inks including CMYK and white for opacity.
- Adhesive powder: Thermoplastic powder that bonds ink to fabric; typically TPU-based.
- Heat press: For curing the powder and transferring the design.
Step-by-Step DTF Workflow
Getting a flawless transfer requires attention to detail at every stage. Here's the process I follow in my own shop.
1. Design Preparation
Start with a high-resolution image (300 DPI or vector). Mirror the design horizontally because you'll print it in reverse. Ensure your printer's software is set to mirror automatically; otherwise, your text will read backwards. For white ink, decide whether you need a white underbase. On dark garments, a white layer behind the color inks is essential for vibrancy. Most RIP software handles this, but always preview the white channel.
2. Printing onto Film
Load the DTF film into your printer, ensuring the coated side faces the printhead. Set the printer to the correct media type and quality (usually "photo" or "high quality"). Print a test strip if you're using a new film brand. After printing, let the ink settle for a minute; you'll see a slight gloss. Avoid touching the printed area.
3. Powder Application
Sprinkle the adhesive powder evenly over the wet print. I use a shaker bottle for controlled distribution. Then, tilt the film and tap off excess powder. You want a thin, uniform layer that sticks only to the ink. Too much powder leads to a rough feel; too little causes poor adhesion. A good trick: after tapping, hold the film under a bright light to check for bare spots.
4. Curing the Powder
Place the film in a curing oven or under a heat source at around 160-170°C (320-340°F) for 2-3 minutes. The powder should melt and become glossy. If you don't have an oven, you can use a heat press with the film between two sheets of parchment, but be careful not to scorch the film. Once cured, the transfer is ready to use or store.
5. Heat Pressing onto Garment
Pre-press the garment for 5-10 seconds to remove moisture. Set your heat press to 160°C (320°F) with medium pressure. Place the transfer on the fabric, cover with parchment or a Teflon sheet, and press for 15-20 seconds. For cold-peel film, let it cool completely before peeling; for hot-peel, peel immediately. I prefer cold-peel for intricate designs because it reduces the risk of tearing.
Choosing the Right DTF Supplies
Not all films and powders are created equal. The film's coating affects ink release and durability. Double-sided coated films are popular because they prevent ink from bleeding through. Powder mesh size matters: finer powders (80-100 micron) give a softer hand, while coarser powders (150-200 micron) offer stronger adhesion on stretchy fabrics. I keep both on hand and match them to the job. For stretchy activewear, I use a fine powder and a stretchable film. For heavy canvas, a coarser powder works better.
Ink Considerations
DTF inks are pigment-based and require regular agitation to prevent settling. White ink is especially prone to clogging, so daily printing or automated circulation is a must. If you're not printing daily, run a nozzle check and clean the printhead. I also recommend using a dedicated DTF printer rather than converting an old inkjet; the white ink system and film feed mechanism are critical for consistent results.
Common DTF Problems and How to Fix Them
Even with experience, issues arise. Here are fixes for the most frequent complaints.
Transfer Peels Off After Washing
This usually means insufficient powder or under-curing. Increase powder coverage and ensure the powder is fully melted (glossy, not matte). Also, check your heat press temperature and pressure; too low a temperature prevents proper bonding. I always do a wash test on a scrap garment before a big order.
Design Looks Faded or Dull
On dark fabrics, a lack of white underbase causes colors to sink. Make sure your RIP software is set to print white first. Also, ensure you're using the correct ink profile for your film. Some films require higher ink limits.
Film Jams or Ink Smudges
This often stems from using the wrong film thickness or a dirty printer. Clean your rollers and platen regularly. Store film in a dry, dust-free environment; moisture can cause the coating to degrade.
DTF vs Other Printing Methods
How does DTF stack up against DTG, vinyl, and screen printing? DTG is great for cotton but struggles with polyester and dark colors. Vinyl is durable but limited to simple shapes. Screen printing offers the best cost per unit for large runs but requires setup and can't handle complex gradients easily. DTF hits a sweet spot: no minimums, full-color capability, and excellent durability on a wide range of fabrics. For small businesses, it's a game-changer.
Frequently Asked Questions
Can I use DTF on any fabric?
DTF works on most fabrics, including cotton, polyester, blends, nylon, and leather. However, on highly stretchy fabrics, use a stretchable film and fine powder to prevent cracking. On waterproof fabrics, adhesion may be reduced; pre-testing is advised.
How long do DTF transfers last?
When applied correctly, DTF transfers can last 50+ washes without fading or peeling. Proper curing and pressing are key. Always follow wash instructions: turn the garment inside out and use cold water.
Do I need a special printer for DTF?
Yes, a dedicated DTF printer is recommended because it has a white ink circulation system and a film feed mechanism. Converting a standard inkjet is possible but often leads to clogs and inconsistent results.
What is the best powder for DTF?
TPU-based hot-melt powder is standard. Choose finer mesh (80-100 micron) for soft hand and detail, and coarser mesh (150-200 micron) for heavy-duty adhesion on tough fabrics.
Can I reuse DTF film?
No, DTF film is single-use. Once the transfer is pressed, the film is discarded. However, you can store printed transfers for months before use if kept clean and dry.
Mastering DTF printing takes practice, but the rewards are worth it. With the right supplies and a bit of patience, you can produce professional-grade custom apparel that delights customers and grows your business. Start with small tests, keep a log of your settings, and don't be afraid to experiment. Happy printing!