DTF printing tips help designers and printers achieve durable, vibrant garments with repeatable results. Focusing on DTF film quality and reliable components makes a big difference in overall durability and wash fastness. Mastering DTF transfer durability begins with calibrated DTF printer settings, precise DTF curing time, and controlled heat pressing. Test on sample garments to validate color management, edge sealing, and proper post-press handling before production runs. This guide compiles practical DTF printing tips to help you avoid cracking, fading, and peel-offs while keeping designs sharp.
Viewed through the lens of alternative phrasing, direct-to-film workflows emphasize film-transfer durability and consistent print quality. Key factors include optimizing DTF printer settings for stable ink laydown, selecting films with high DTF film quality and predictable release, and managing DTF curing time to activate the adhesive without compromising color. Consider the practical differences between DTF hot peel vs cold peel techniques to ensure edge sealing remains intact across fabrics. Assess durability through controlled wash tests and fabric compatibility, which aligns with an LSI approach to measuring transfer longevity. By framing tips in varied terms—film-based transfer, adhesive curing, and heat-press optimization—you can connect with broader audiences while preserving the core durability message.
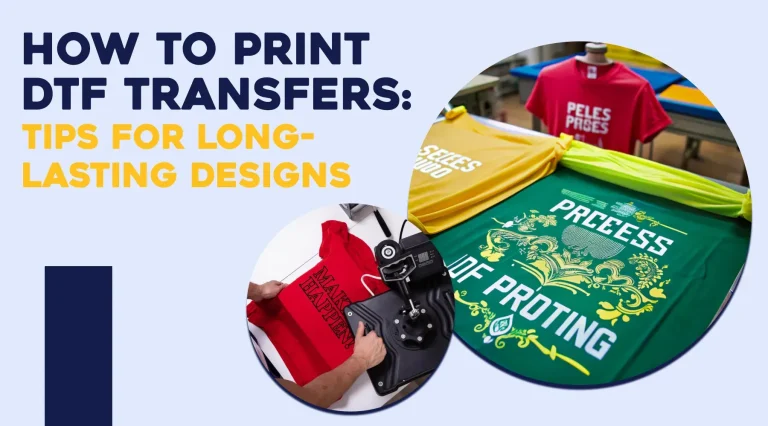
DTF Printing Tips for Maximum Durability
Effective DTF printing tips begin with a clear understanding of the materials and process. By applying tested practices, you can boost DTF transfer durability and the vibrancy of colors while reducing cracking, fading, and edge lift.
Careful attention to DTF film quality and ink selection, together with calibrated DTF curing time and appropriate heat press settings, makes a tangible difference in wash-fastness and hand feel. Prioritizing a consistent workflow across design, curing, and pressing helps ensure long-lasting transfers that stay sharp wash after wash.
DTF Film Quality and Its Impact on Longevity
The film you choose sets the stage for all subsequent steps. High-quality PET film with stable dimensional properties reduces edge lifting and provides a smoother transfer, contributing to a superior overall result.
Assess film quality by evaluating release behavior, coating uniformity, and tolerance to washing. A superior film enhances edge sealing and consistent ink deposition, supporting stronger DTF transfer durability and a uniform hand feel across fabrics.
DTF Curing Time: Timing for a Strong Bond
Curing time is the hidden driver of adhesive activation and transfer longevity. Too little curing leaves the bond underperforming, while over-curing can degrade ink and reduce wash-fastness, compromising durability.
To optimize curing time, follow adhesive specifications, test a few samples, and adjust the heat source, conveyor speed, and airflow to ensure even cure across the print. Proper curing is essential for consistent ride-through and a reliable bond between film and fabric.
DTF Printer Settings: Calibrate for Consistent Color and Durability
Printer settings influence color stability and durability as much as the transfer process itself. Consistently calibrated machines, appropriate ICC profiles, and a reliable white underprint setup help maintain vibrancy and wash resistance.
Maintain the printer by regularly checking nozzles, aligning the print head, and controlling ink density to avoid oversaturation that can crack during flex. Thoughtful DTf printer settings support durable results and predictable production quality.
DTF Hot Peel vs Cold Peel: Picking the Right Peel Method
Peel strategy affects edge sealing and hand feel. Hot peel can deliver immediate edge clarity but may require rapid cooling and careful handling to avoid edge lift, while cold peel often yields stronger edge seals with more controlled cooling.
Test both methods on representative fabrics to determine durability outcomes, and follow the adhesive manufacturer’s recommended peel type for optimal wash durability. Matching peel strategy to your adhesive and fabric type helps prevent delamination over time.
Fabric Compatibility and DTF Transfer Durability Across Materials
Different fabrics interact with adhesives and films in distinct ways, shaping overall durability. Cotton fabrics may flex more and polyester blends can resist heat differently, impacting DTF transfer durability.
Plan fabric-specific trials, adjust curing times, and tailor heat press settings to each material type; thorough testing reduces cracking, fading, and peel-offs, ensuring reliable performance across garments.
Frequently Asked Questions
What DTF printer settings are best for maximizing DTF transfer durability?
Calibrate your printer and use ICC profiles; 150–300 dpi provides sharp edges while keeping production times reasonable, and ensure a reliable white underprint on dark fabrics for opacity. Use inks recommended by your film and adhesive supplier; proper color management improves wash-fastness and overall DTF transfer durability. Keep nozzles clean and follow the adhesive’s curing specs; run test swatches to verify durability before full production.
How does DTF film quality influence DTF transfer durability and curing time?
High-quality film offers stable dimensional stability and consistent release, reducing edge lifting and cracking during wash, which supports DTF transfer durability and consistent curing. It supports even ink deposition and reliable curing; a mismatched film can lead to slower or incomplete curing and weaker bonds. Always choose film with proven compatibility with your inks and adhesives, and test curing time with samples to confirm durability.
What is the difference between DTF hot peel vs cold peel, and how does peel choice affect DTF durability?
Hot peel removes the film while the adhesive sets quickly; cold peel requires more cooling time to seal edges fully. The peel method influences edge sealing and long-term durability; follow the adhesive manufacturer’s recommendation and test both methods. With proper edge seal and complete bonding, both methods can yield durable transfers with minimal peel-offs.
How should I optimize DTF curing time to improve bond strength and prevent cracking?
Adhere to adhesive specifications; use a controlled heat source and maintain 150–160°C with 12–15 seconds as a starting point. Ensure complete curing before removing the transfer sheet to avoid delamination; avoid over-curing which can degrade ink. Validate curing time with sample fabric types and adjust as needed for durability.
How can I ensure durable DTF transfers across fabrics by managing curing time and film quality?
Test films on representative fabrics to confirm dimensional stability and edge sealing; select film with good release properties. Calibrate curing time per fabric type and adhesive; ensure the ink and adhesive fully cure without scorching. Use a controlled heat press and perform wash tests on samples to verify durability before production runs.
What indicators show poor DTF film quality and how does that affect DTF transfer durability and wash-fastness?
Signs of poor film quality include curling, uneven release, and inconsistent ink deposition that can cause cracking or color shifts. These issues degrade DTF transfer durability and wash-fastness; mitigate by choosing QA-tested film and performing pre-production tests, and by following the manufacturer’s curing recommendations for your film and adhesives.
| Aspect | Key Points |
|---|---|
| Overview | DTF tips help create durable, vibrant transfers; core steps include film/ink selection, heat press settings, curing times, and fabric choice. |
| DTF Process Elements | Printed film with CMYK (and white), adhesive powder, heat curing, and transfer to fabric. Steps: print on PET film, powder coat, cure, then heat transfer. |
| Common Issues | Cracking, fading, and peel-offs explained by edge sealing, color management, curing, and adhesive quality; inappropriate pressing times or temperatures can worsen results. |
| Quality Materials | Use reliable PET film, high-quality adhesive powder, and inks with strong colorfastness; good edge sealing and dimensional stability reduce lift. |
| Color Management | Calibrate printers, use ICC profiles, and test colors on blank swatches to ensure consistent, durable color. |
| Curing Process | Cure the adhesive properly; use a controlled heat source; match temperatures to adhesive specs; avoid over- or under-curing that can degrade ink or bond. |
| Heat Press Settings | Typical starting point: 150–160°C (302–320°F) with moderate pressure for 12–15 seconds; adjust for fabric type and design. |
| Pre-Press | Brief pre-press (2–5 seconds) to remove moisture and reduce fabric movement for a uniform bond. |
| Post-Press Handling | Cool briefly on a flat surface; peel according to adhesive guidelines (hot or cold); affects edge sealing and durability. |
| Avoid Overstretch | Do not overstretch fabric during transfer; keep design flat and aligned to minimize cracking as the garment moves. |
| Equipment Maintenance | Regularly clean and calibrate printer, dryer, and heat press; check nozzles and ensure even heat distribution. |
| Durability Strategies | Consider film adhesion, ink deposition, edge sealing, fabric compatibility, and wash tests to verify longevity. |
| Curing Time & Heat Press Tips | Guidelines: 150–160°C; 12–15 seconds; medium pressure; allow cooling; ensure complete cure before handling. |
| Printer Settings & Color Management | Use 150–300 dpi resolution; ensure white underprint on dark fabrics; follow ink and maintenance recommendations. |
| Peel Strategies | Hot peel vs cold peel; follow adhesive recommendations; test on samples to choose best method. |
| Fabric Types & Impact | Cotton/cotton blends and polyester blends respond differently; dark fabrics often need white underprint; test and adjust temps and times. |
| Quality Control & Troubleshooting | Pre-production testing, visual/tactile checks, washing care instructions; quick guides for cracking, fading, and peel-offs. |
| Real-World Tips | Maintain a stable environment; document SOPs; conduct regular QA checks; pursue ongoing training. |
Summary
DTF printing tips describe a disciplined approach to choosing materials, calibrating processes, and fine-tuning heat-and-pressure parameters to create durable, vibrant transfers. By understanding the DTF process, addressing cracking and fading head-on, and applying consistent testing and quality control, you can achieve reliable results across a wide range of fabrics. Tailor your settings to your film, adhesive, and inks per manufacturer guidelines, perform the essential pre-press and post-press steps, and maintain equipment to prevent wear. With methodical experimentation and documentation, your DTF projects will endure wash after wash while preserving color and texture.